
And how it interconnects with DualSense wireless controller features and 3D Audio.
My name is Johannes Koski and I’m the UI/UX Director of Returnal here at Housemarque. My role in the project has been both taking part in the design and overseeing and supporting the work done by the team. I’ve had the privilege to work with a diverse multi-disciplinary group of amazing designers, artists, programmers, and audio specialists. We’ve just launched a game that has been my ultimate dream project since I was a little kid, so I’m super excited to be able to share something about our game’s UX!
Gameplay first
The goal of a game’s UI is pretty straightforward: it guides the player and supports the game. In other words it gives the player all the necessary information and tools they need to understand and enjoy the game’s mechanics and at the same time it supports the game’s artistic core and storytelling with aesthetic means. In practice this unravels to hundreds of hours of planning, user interface design, concepting, usability studies, artistic choices, motion design, audio development, optimization, programming, player onboarding, and tutorial design to name a few areas.
Our core design principle is “gameplay first”. When designing the overall UX, one of our main goals was to remove all possible distractions from the second-to-second gameplay. We wanted to keep all the menus as clean and as minimal as possible. We even made the decision to not have a title screen or main menu at all and take the player always directly to the action.
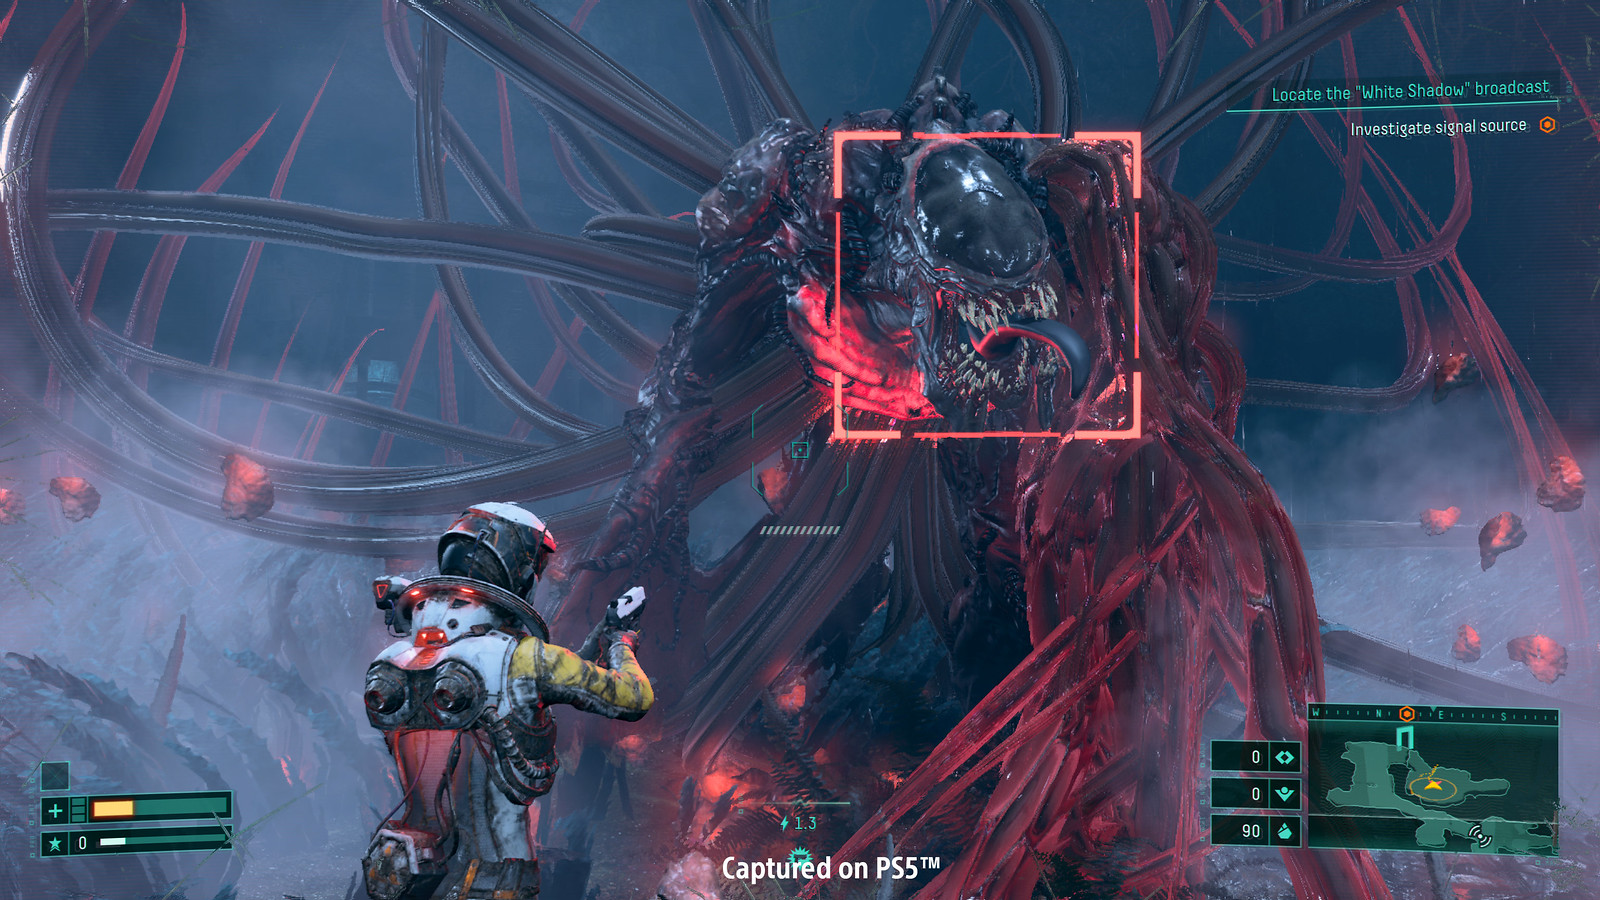
We spent a considerable amount of time finessing all the HUD communications so that the player is always aware of critical gameplay information during intense bullet hell combat. We iterated a lot to find the perfect animation timings, intuitive color coding systems, and optimal information hierarchy to support various gameplay scenarios, etc.
The most crucial information needs to be communicated at the player’s immediate visual focus point — in and near the reticle. Some critical guidance can be shown diegetically in and around the player character model and the actual game world. The content that is not essential for second-to-second survival can be shown in the periphery of the HUD.
Then we have the most important scenarios like near-death, low-health situations, where we throw everything we have at the player’s senses: HUD visor glass cracks and digital glitch animations, threatening vignettes, flashing warning icons, diegetic warning lights in player’s space suit, game world post-processing, health gauge color coding, player character animation, voice-over, VFX, emergency audio signals, and engaging haptic feedback.
The 3D map
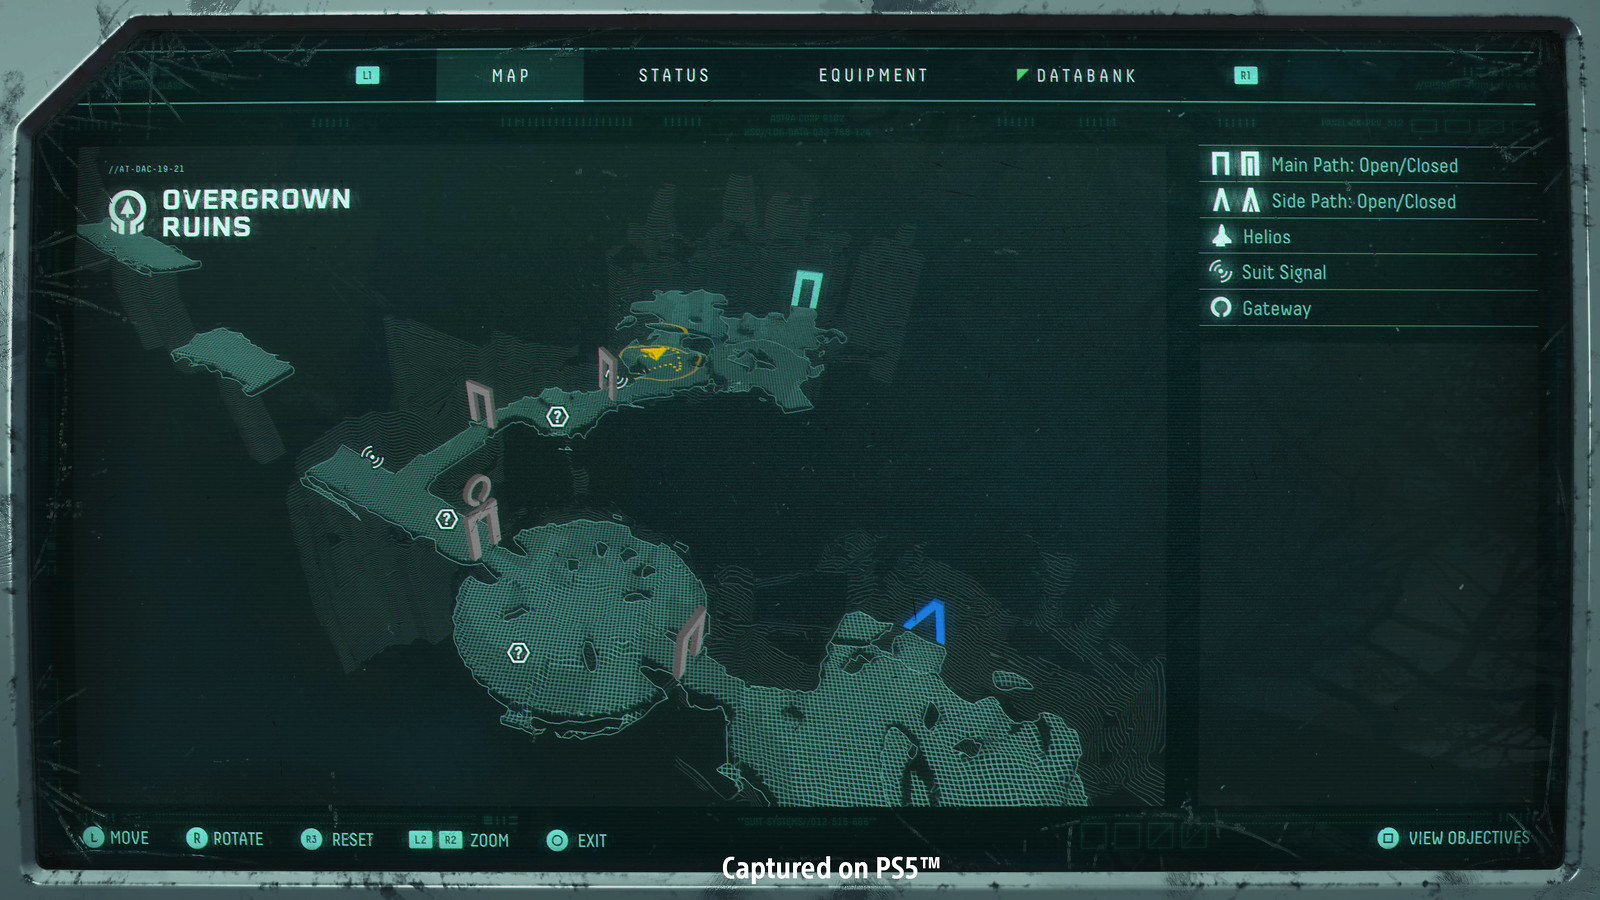
We’re especially happy how our unique 3D map and HUD minimap turned out. There’s a lot of verticality in our levels so a compass or a traditional 2D map wasn’t enough. It was challenging to create a map system for randomly generated levels that was precise, looked good stylistically and wouldn’t cause a performance hit. The map will be very helpful for both player guidance and planning combat flow.
Audio and haptics
We’re using a wide variety of 3D Audio, DualSense wireless controller audio, and haptics to keep the player aware of their situation and surroundings even though their visual focus would be in combat and player survival. For example we implemented a rising charge-up UI sound that telegraphs the charge level of the alternative weapon fire, resolving in a distinct UI audio cue and haptics pulse once it’s fully charged. The haptics for this feature get prioritized in gameplay to give the player feedback on the most important combat cues.
Malignant items emit a heartbeat-like haptics pulse when nearby the player. This heightens the sense of risk and reward associated with these special items and helps in differentiating them from other pickups.
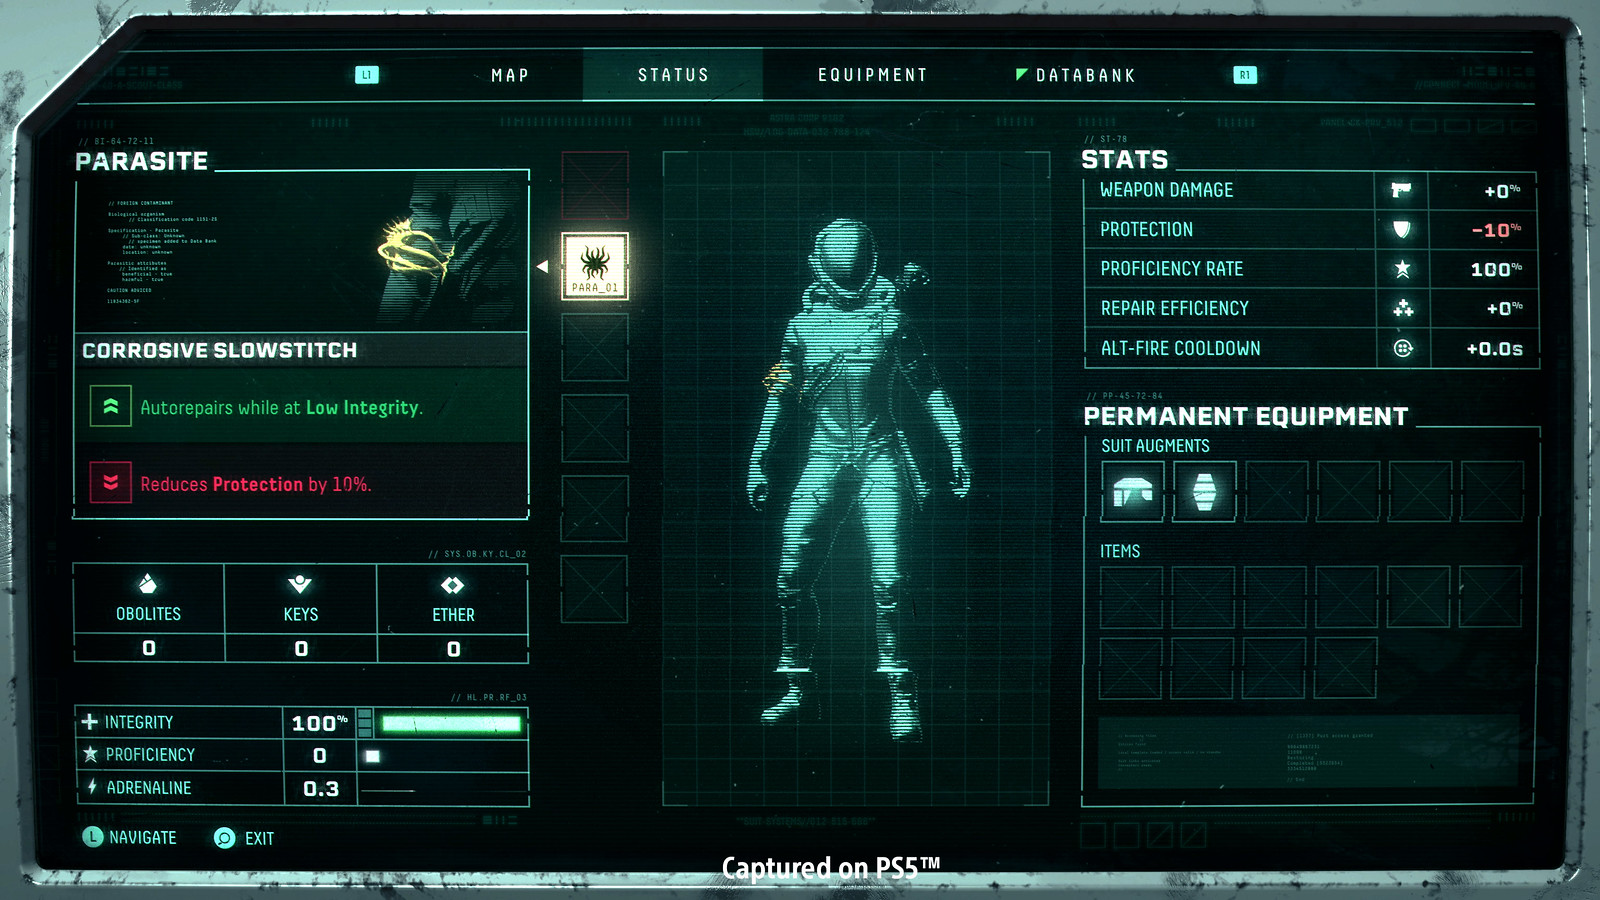
Parasites are another feature that received bespoke audio and haptics. Once you pick one of these up and it becomes attached to your suit, distinct haptic textures and audio cues of the parasite are used to remind the player they picked one up and that it’s active on the suit, potentially causing damage.
The hologram projections appearing while scanning a new item have been complimented by both haptics and sound effects, providing a granular sense of the scanner sweeping through the object as well as adding tactile weight to the interaction experience. Sending these sounds through the controller speaker as well made the whole scanning experience a lot more physical and real for the player.
Haunting industrial nostalgia
For Returnal’s UI art direction, the main direction came from who Selene was, the company she worked for, and the technology she would have available to her. Strictly industrial and functional. This technology is also susceptible to damage and glitch errors because of the devices it’s displayed on: CRT monitors, tactile wrist computer displays, etc.


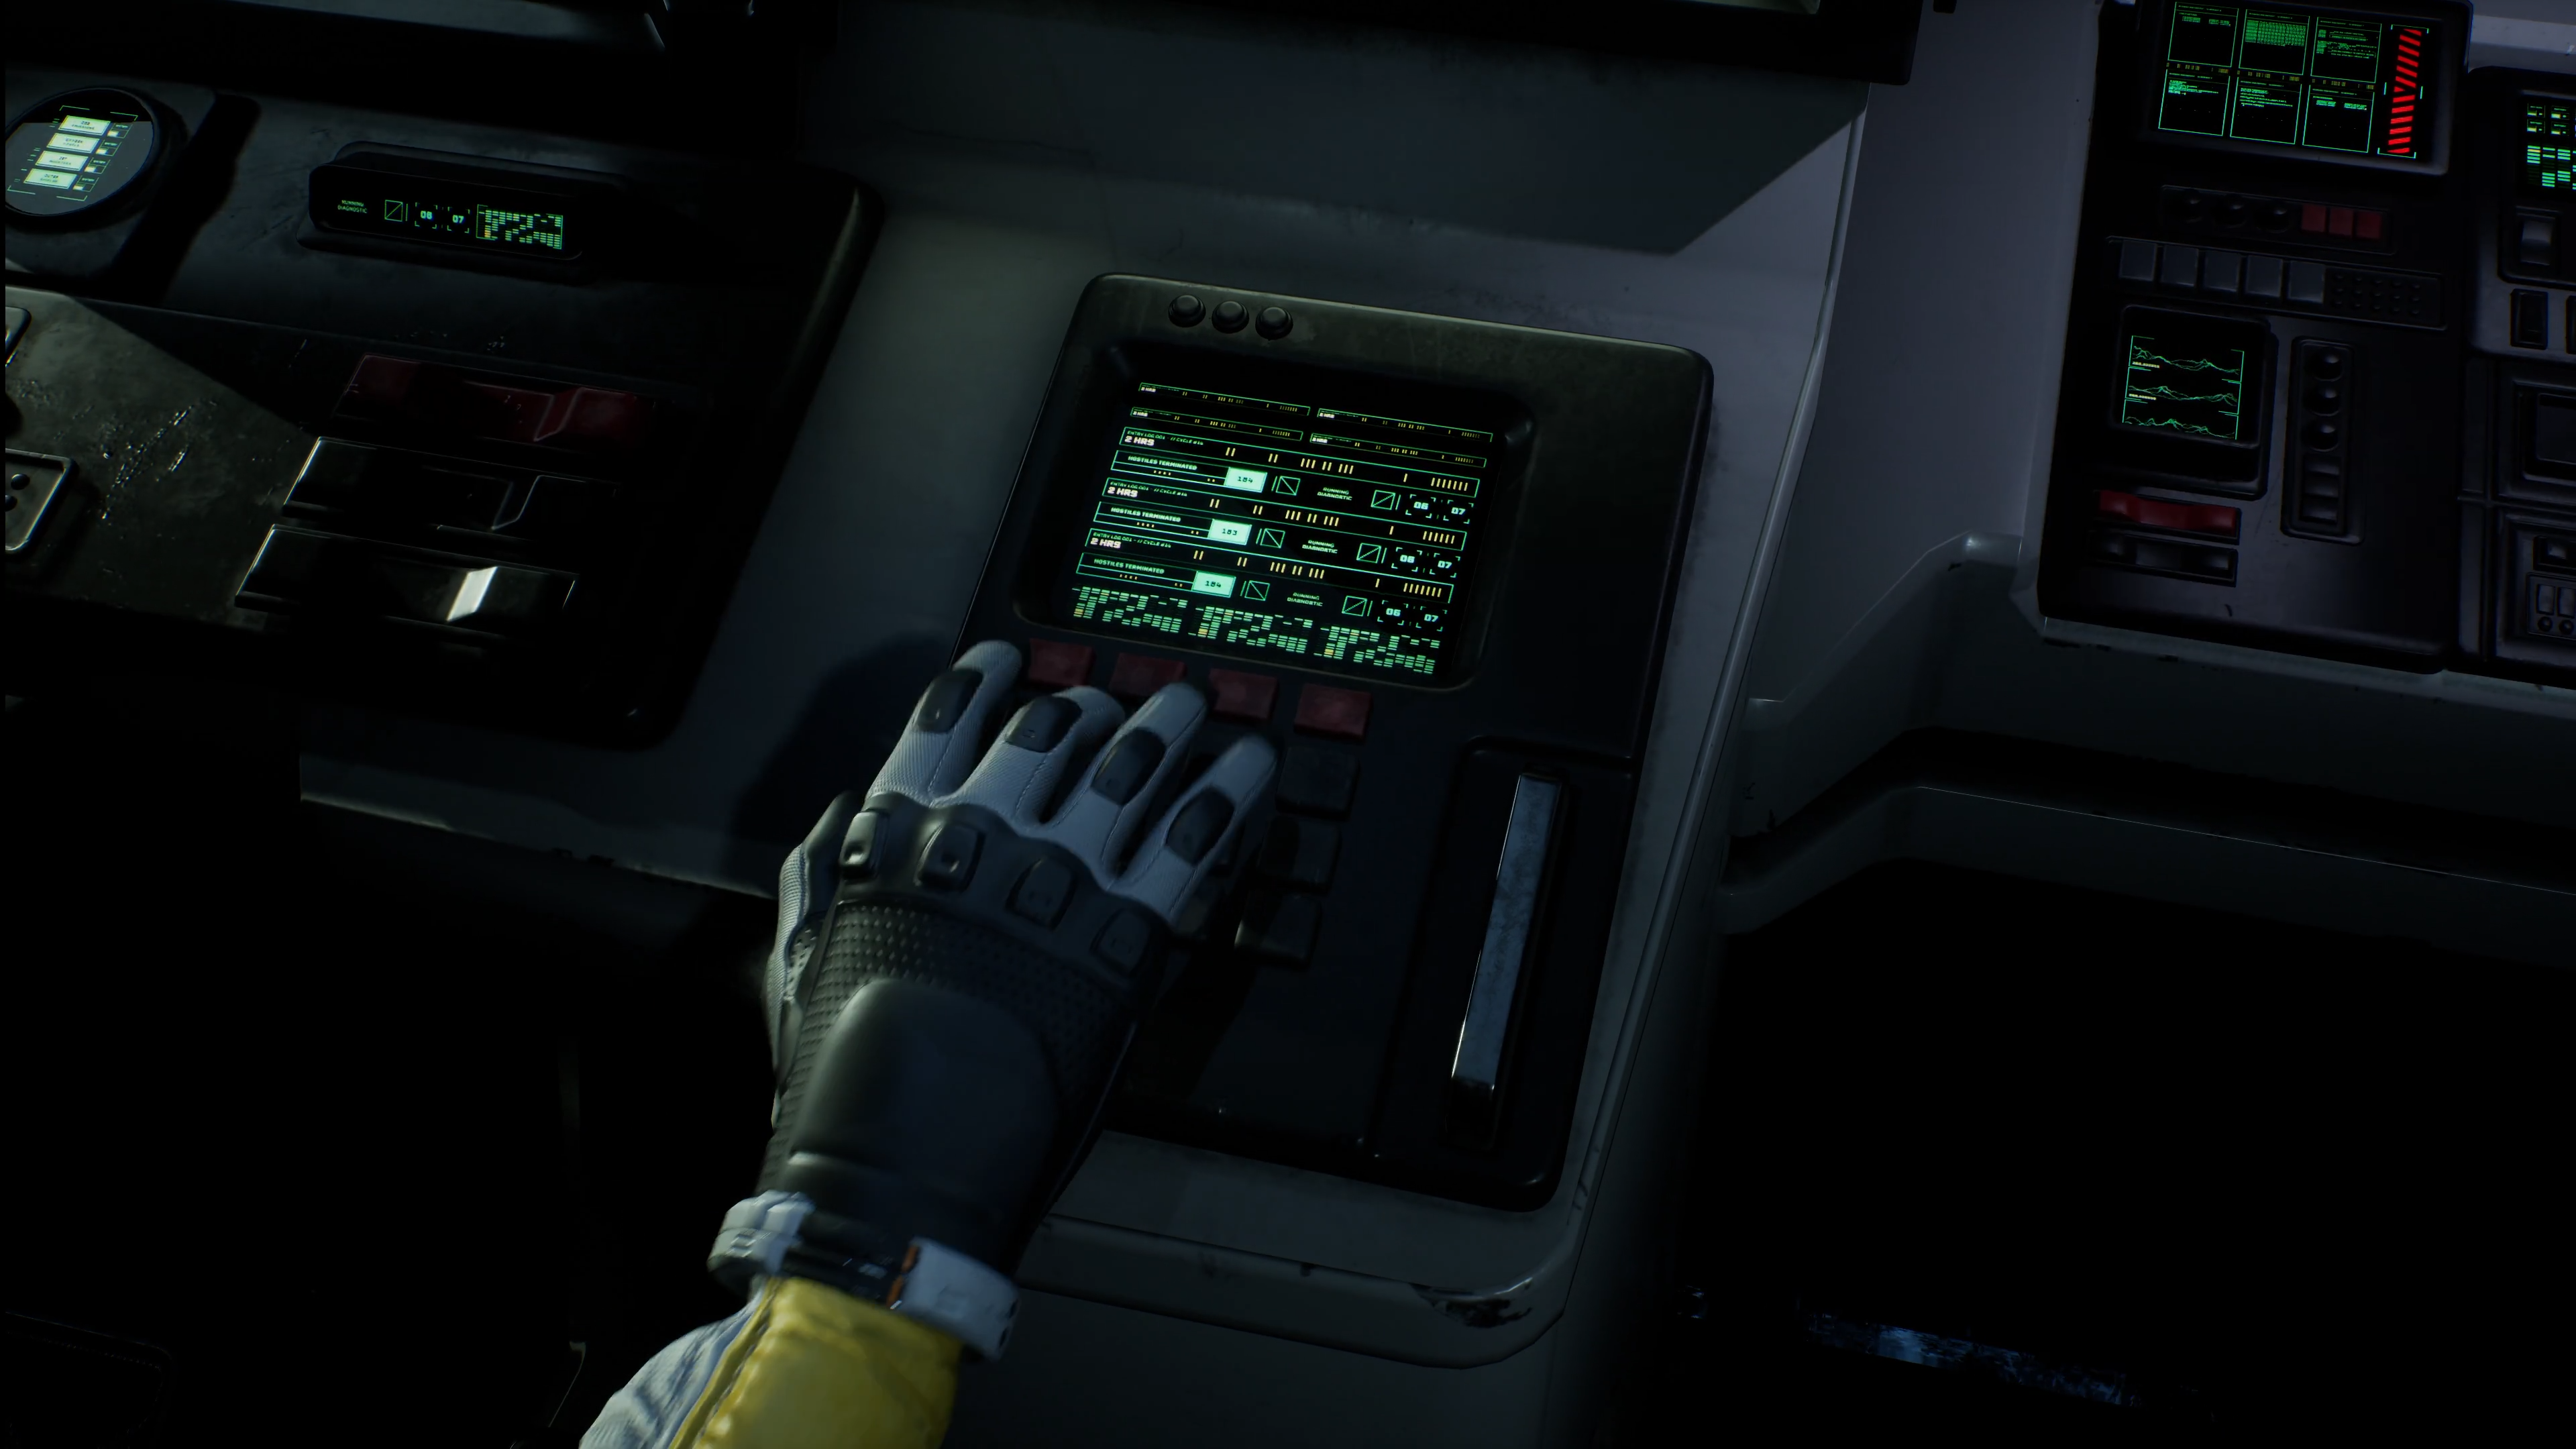
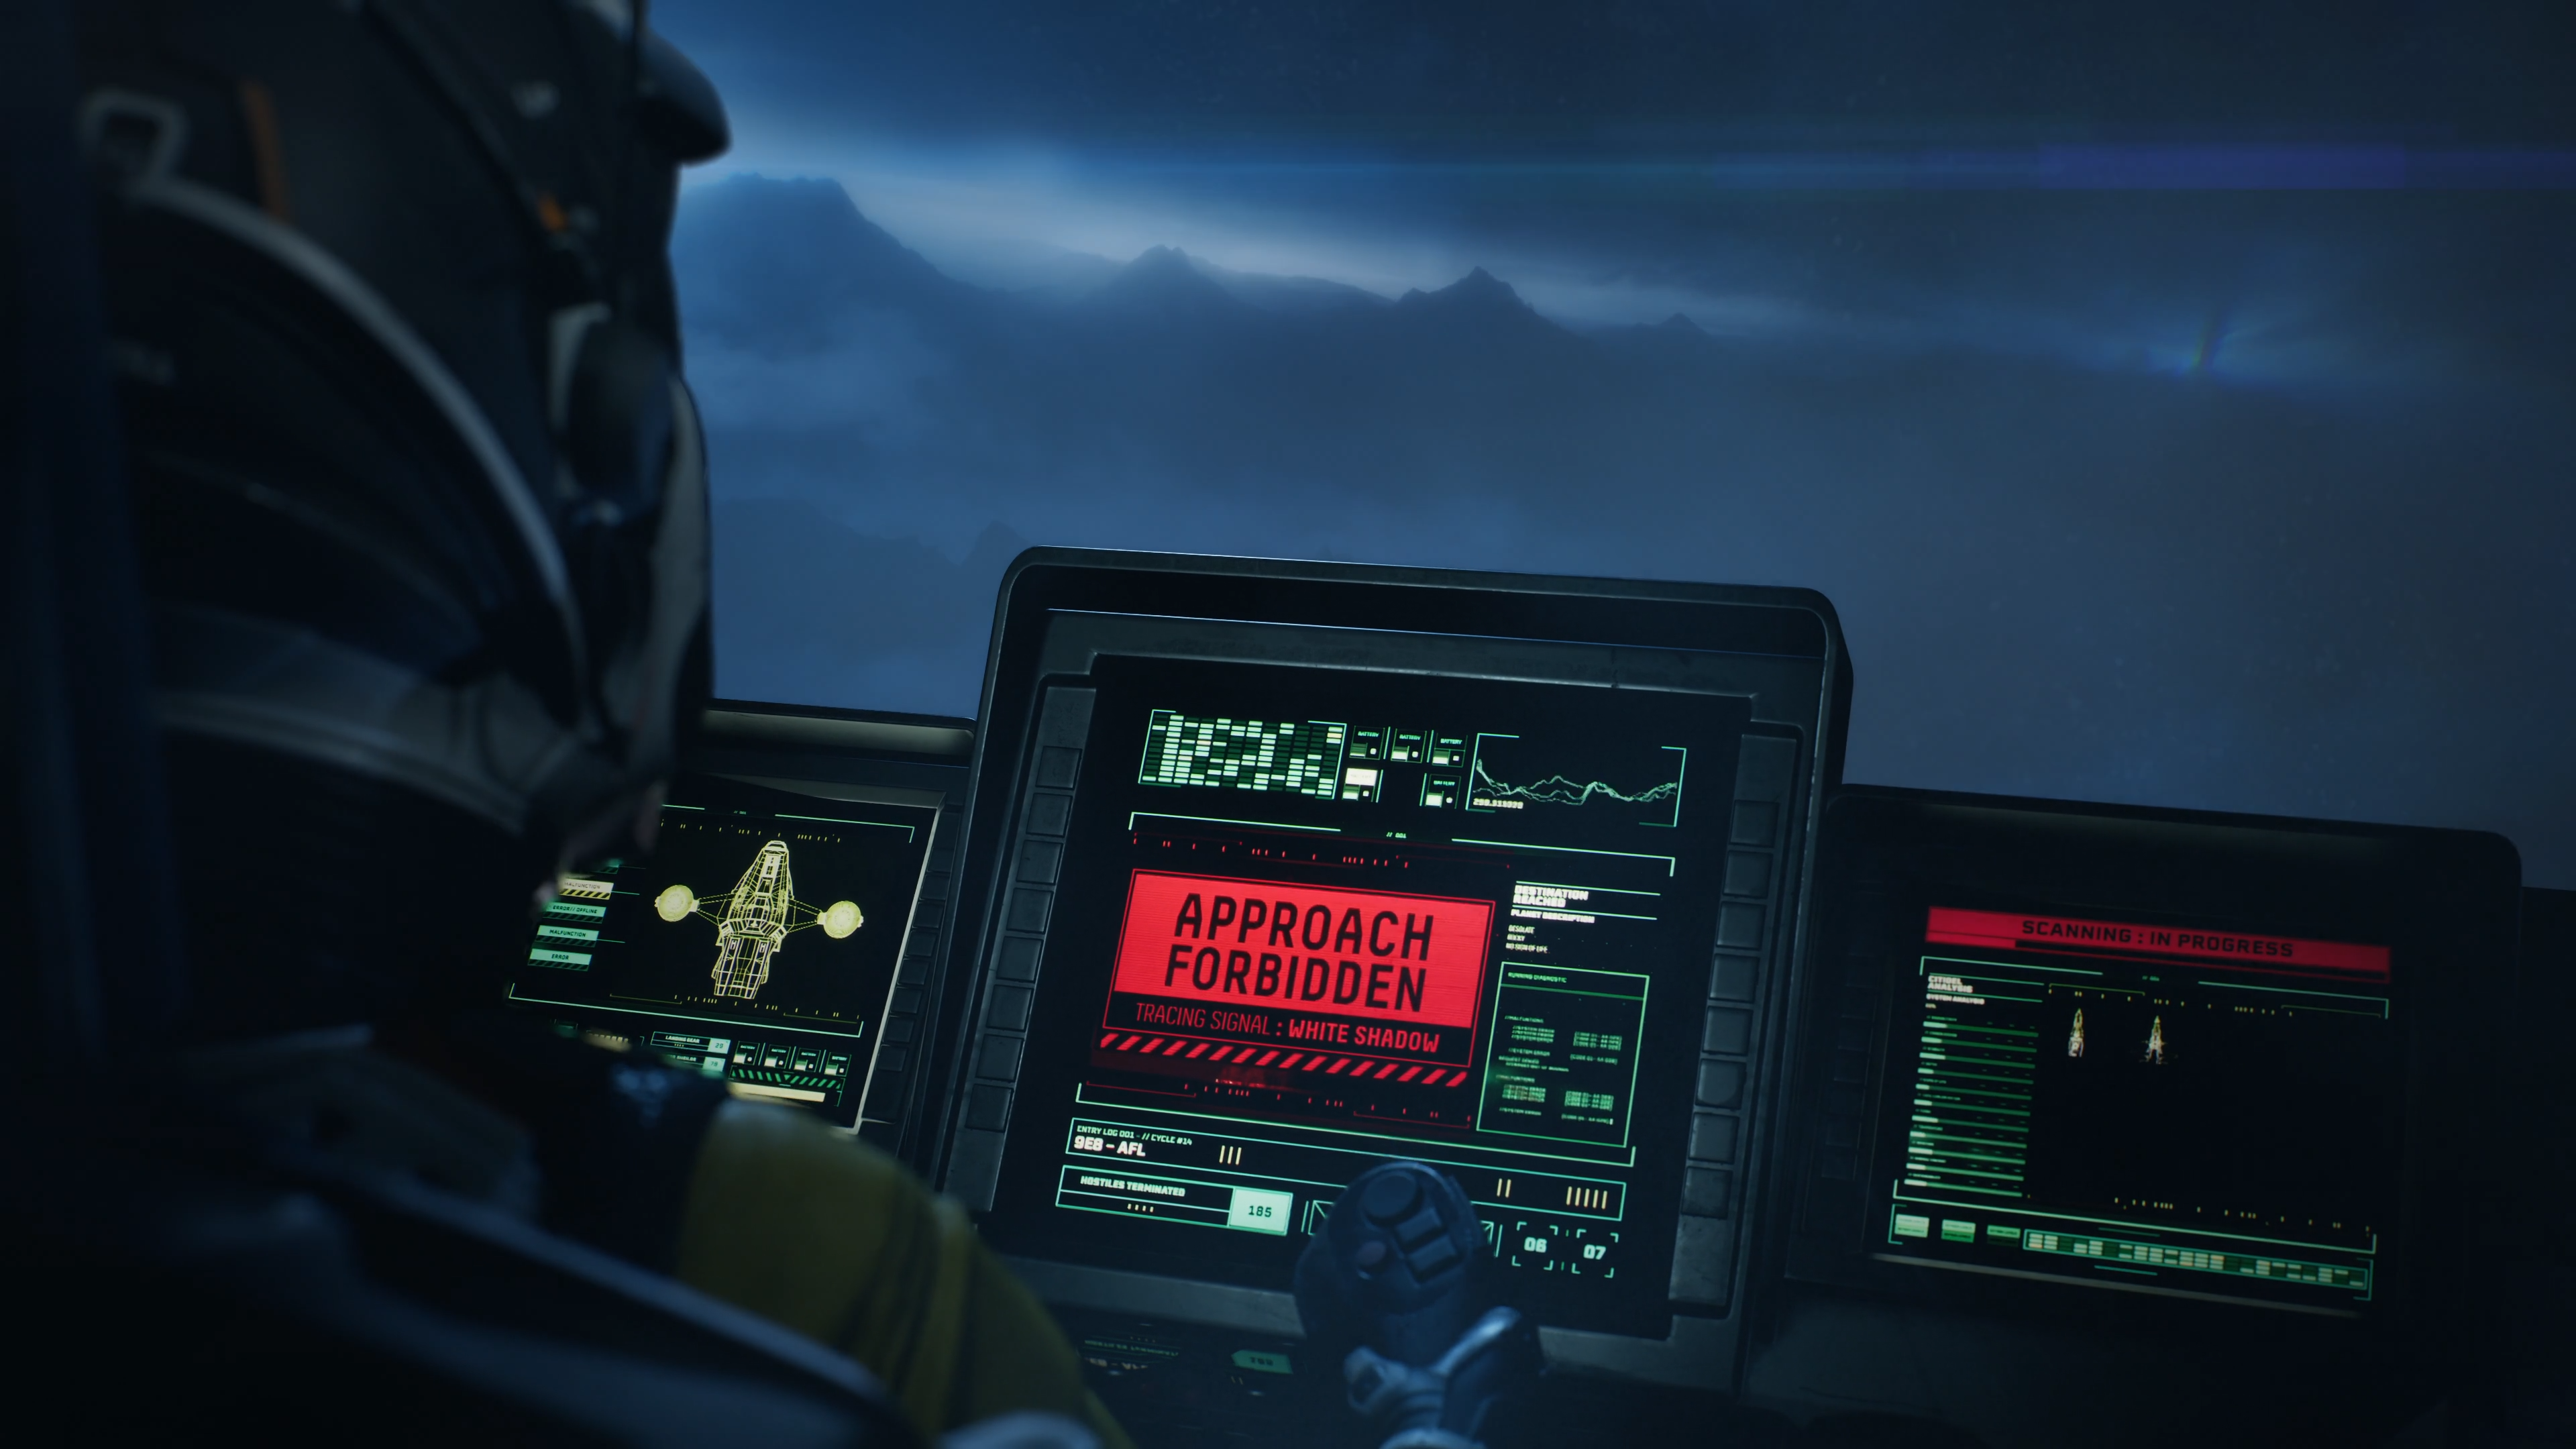
There’s a great correlation between the dated ‘70s aesthetic and good sci-fi horror. This could be because many of us grew up watching these movies and so they stay with us because of that sense of nostalgia. Our primary UI/HUD color is a haunting shade of teal that partly originates from the early monochrome cathode-ray tube computer monitors and tactical night-vision gear. The usage of this particular ghostly color also creates an eerie sense of looming horror.

(Concept art from Returnal, Mighty Canvas)
Looking at old consoles used in traditional industries, there is dedicated space for each component, most of the options are binary and there are no fancy gradients, transitions or effects. It’s chunky and clunky, with little attention to visual flourishes.
We took this idea and limited the effects that we would use. So there is little to no directional motion. Everything flickers on and off. We chose to not create any layers. So no pop-ups over the screen UIs, as this felt too technically developed. The color palette was strict and the only effects and ambient animations are the ones we use to replicate the CRT aesthetic.
Accessibility and customization
For the controls customization we wanted to make it as intuitive as possible and designed it so that the controller map is the very first thing you see when entering the options menu. From there we wanted to draw you in to trying out a different controller preset or create your own to fit your play style.
We put a lot of focus on making the remapping process easy to understand and use. Allowing you to quickly get an overview of where the actions are mapped, using a dynamic graphic on the right, we show where on the controller the action is currently mapped and if deciding to swap, showing which input you swap with.
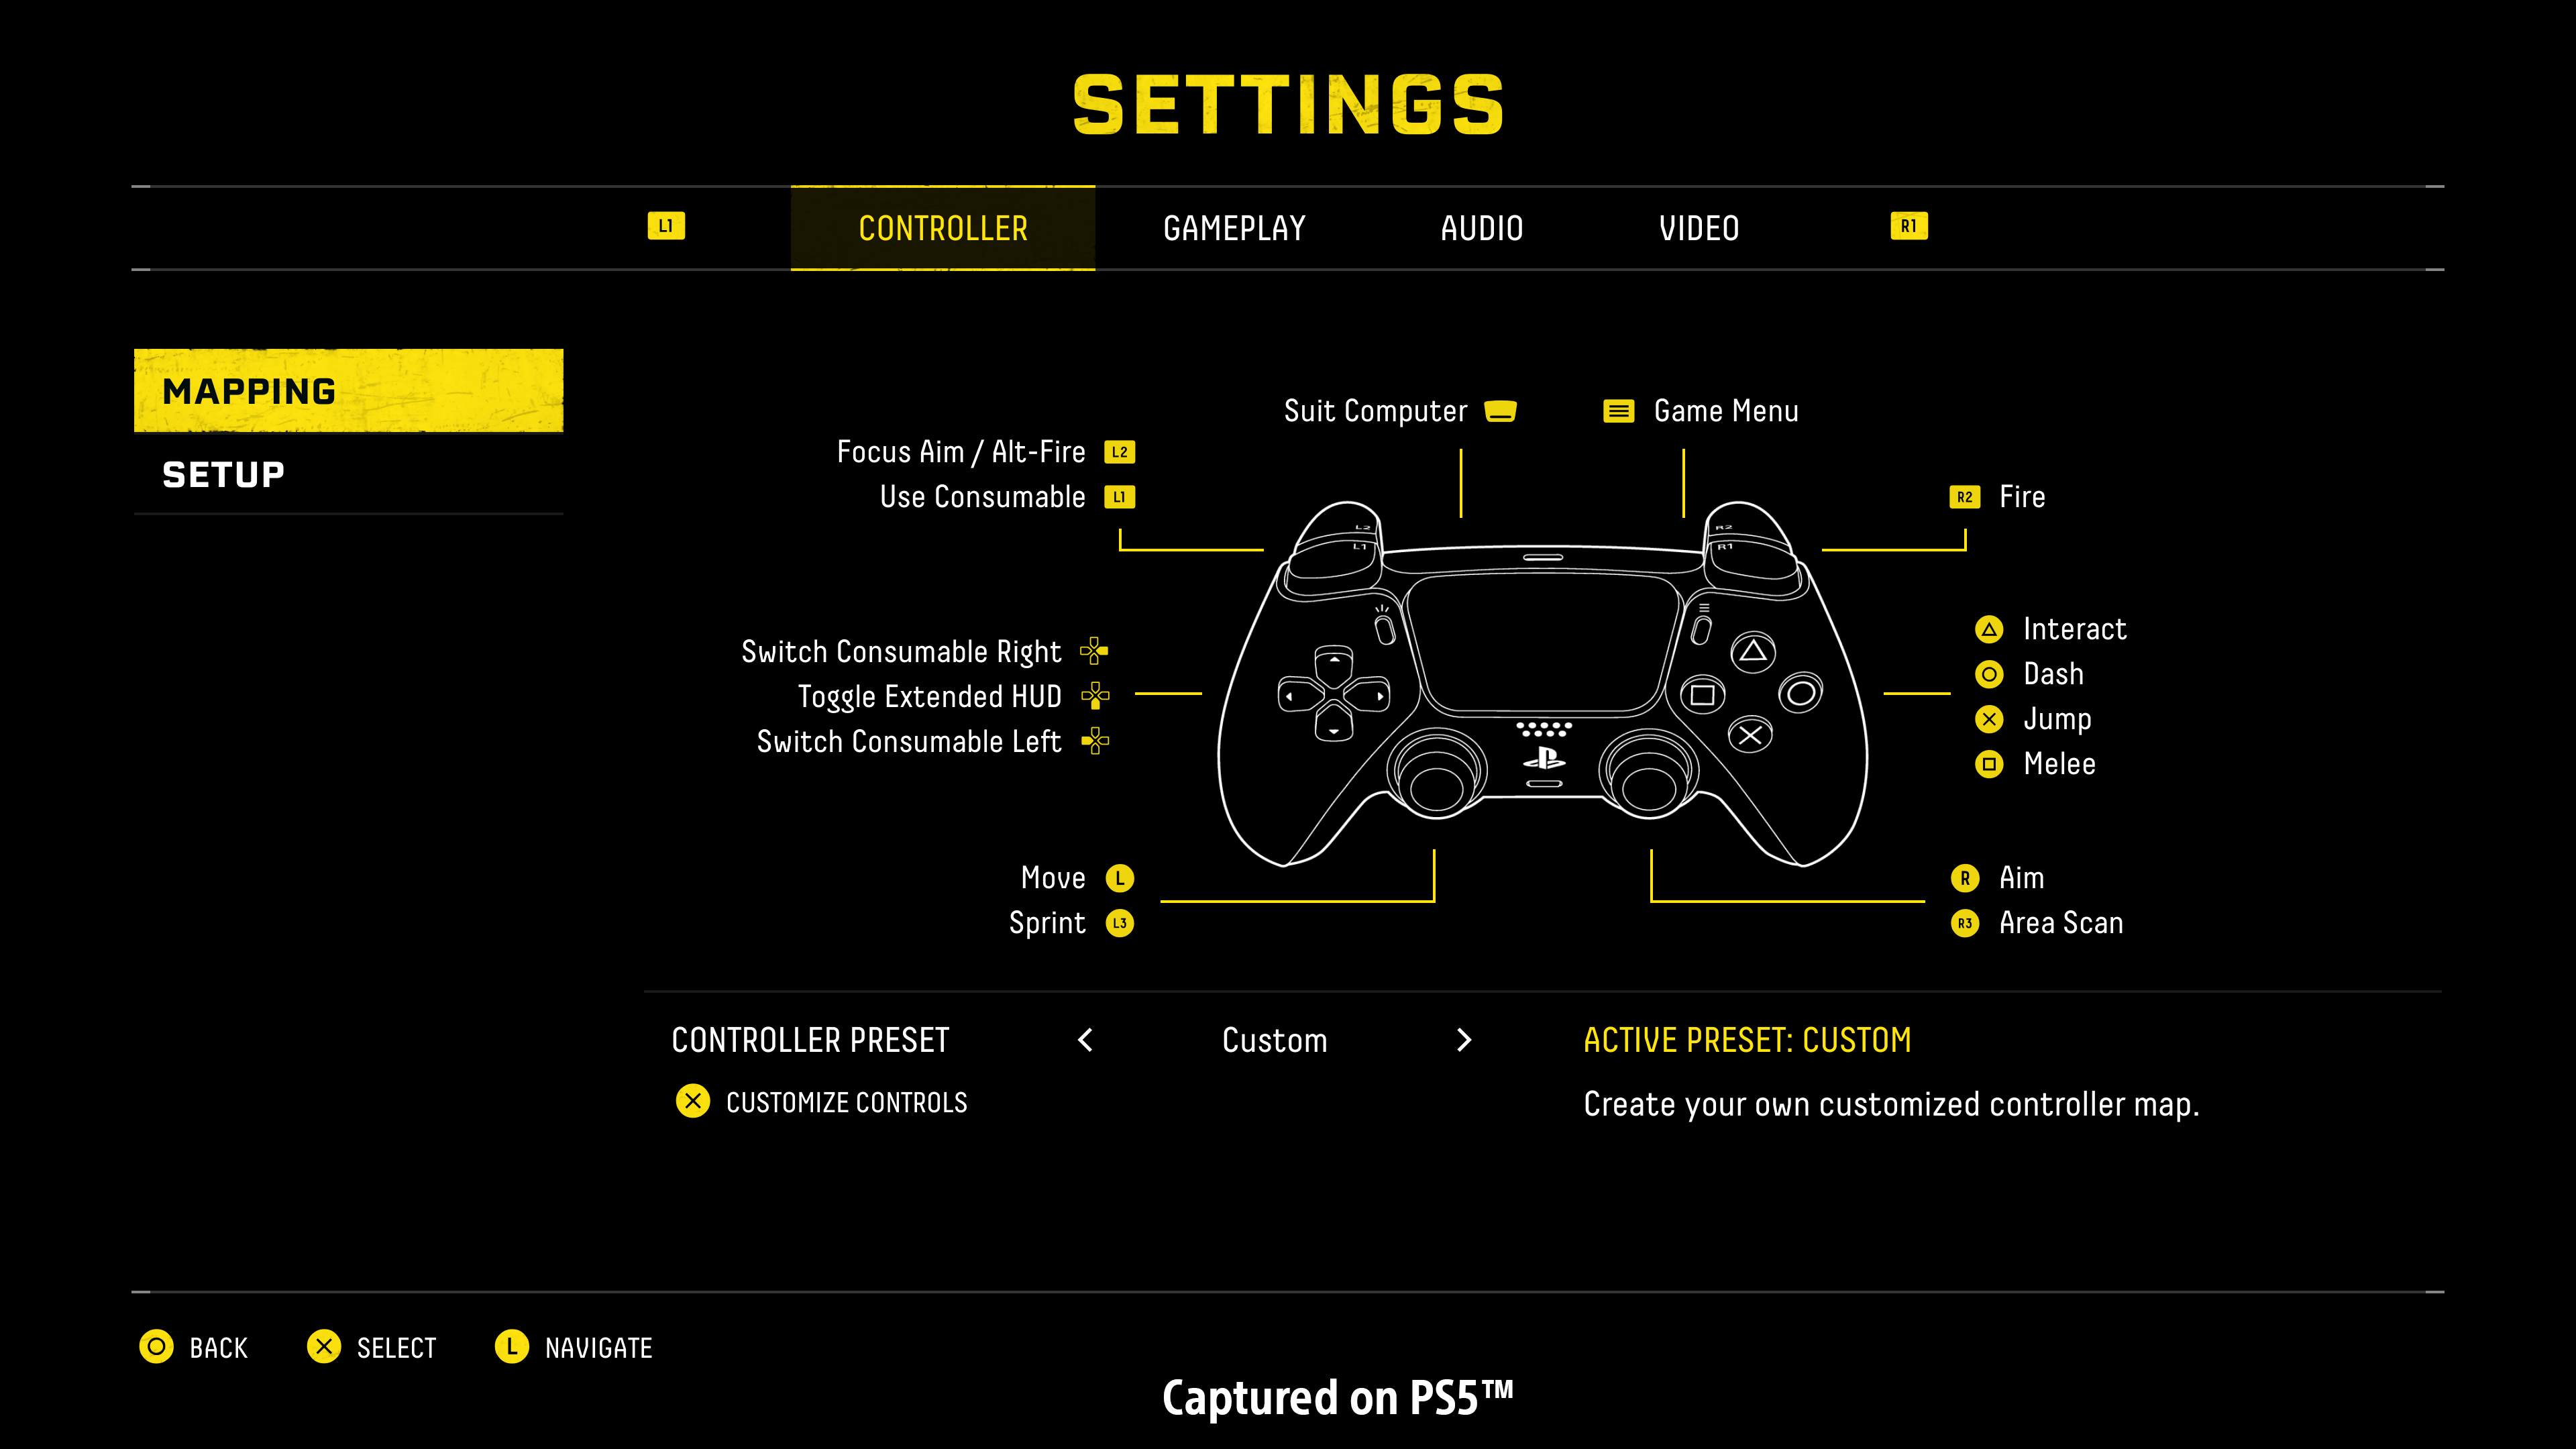
While moving around actions and changing the layout of the DualSense wireless controller, we made sure you could easily see an overview of all of your changes directly from the remapping. A simple button press will bring up the full controller map so you can view your custom setup at any time.
This approach to previewing your changes was carried forward to use for other settings to make it easy to see your changes without having to return to gameplay for each change. When using a custom preset and you have rotated the whole controller for example, the preview on the right hand column will dynamically update to reflect that.If you are changing the deadzone on the right stick, we highlight the stick in the preview to make it clear which one you are changing.
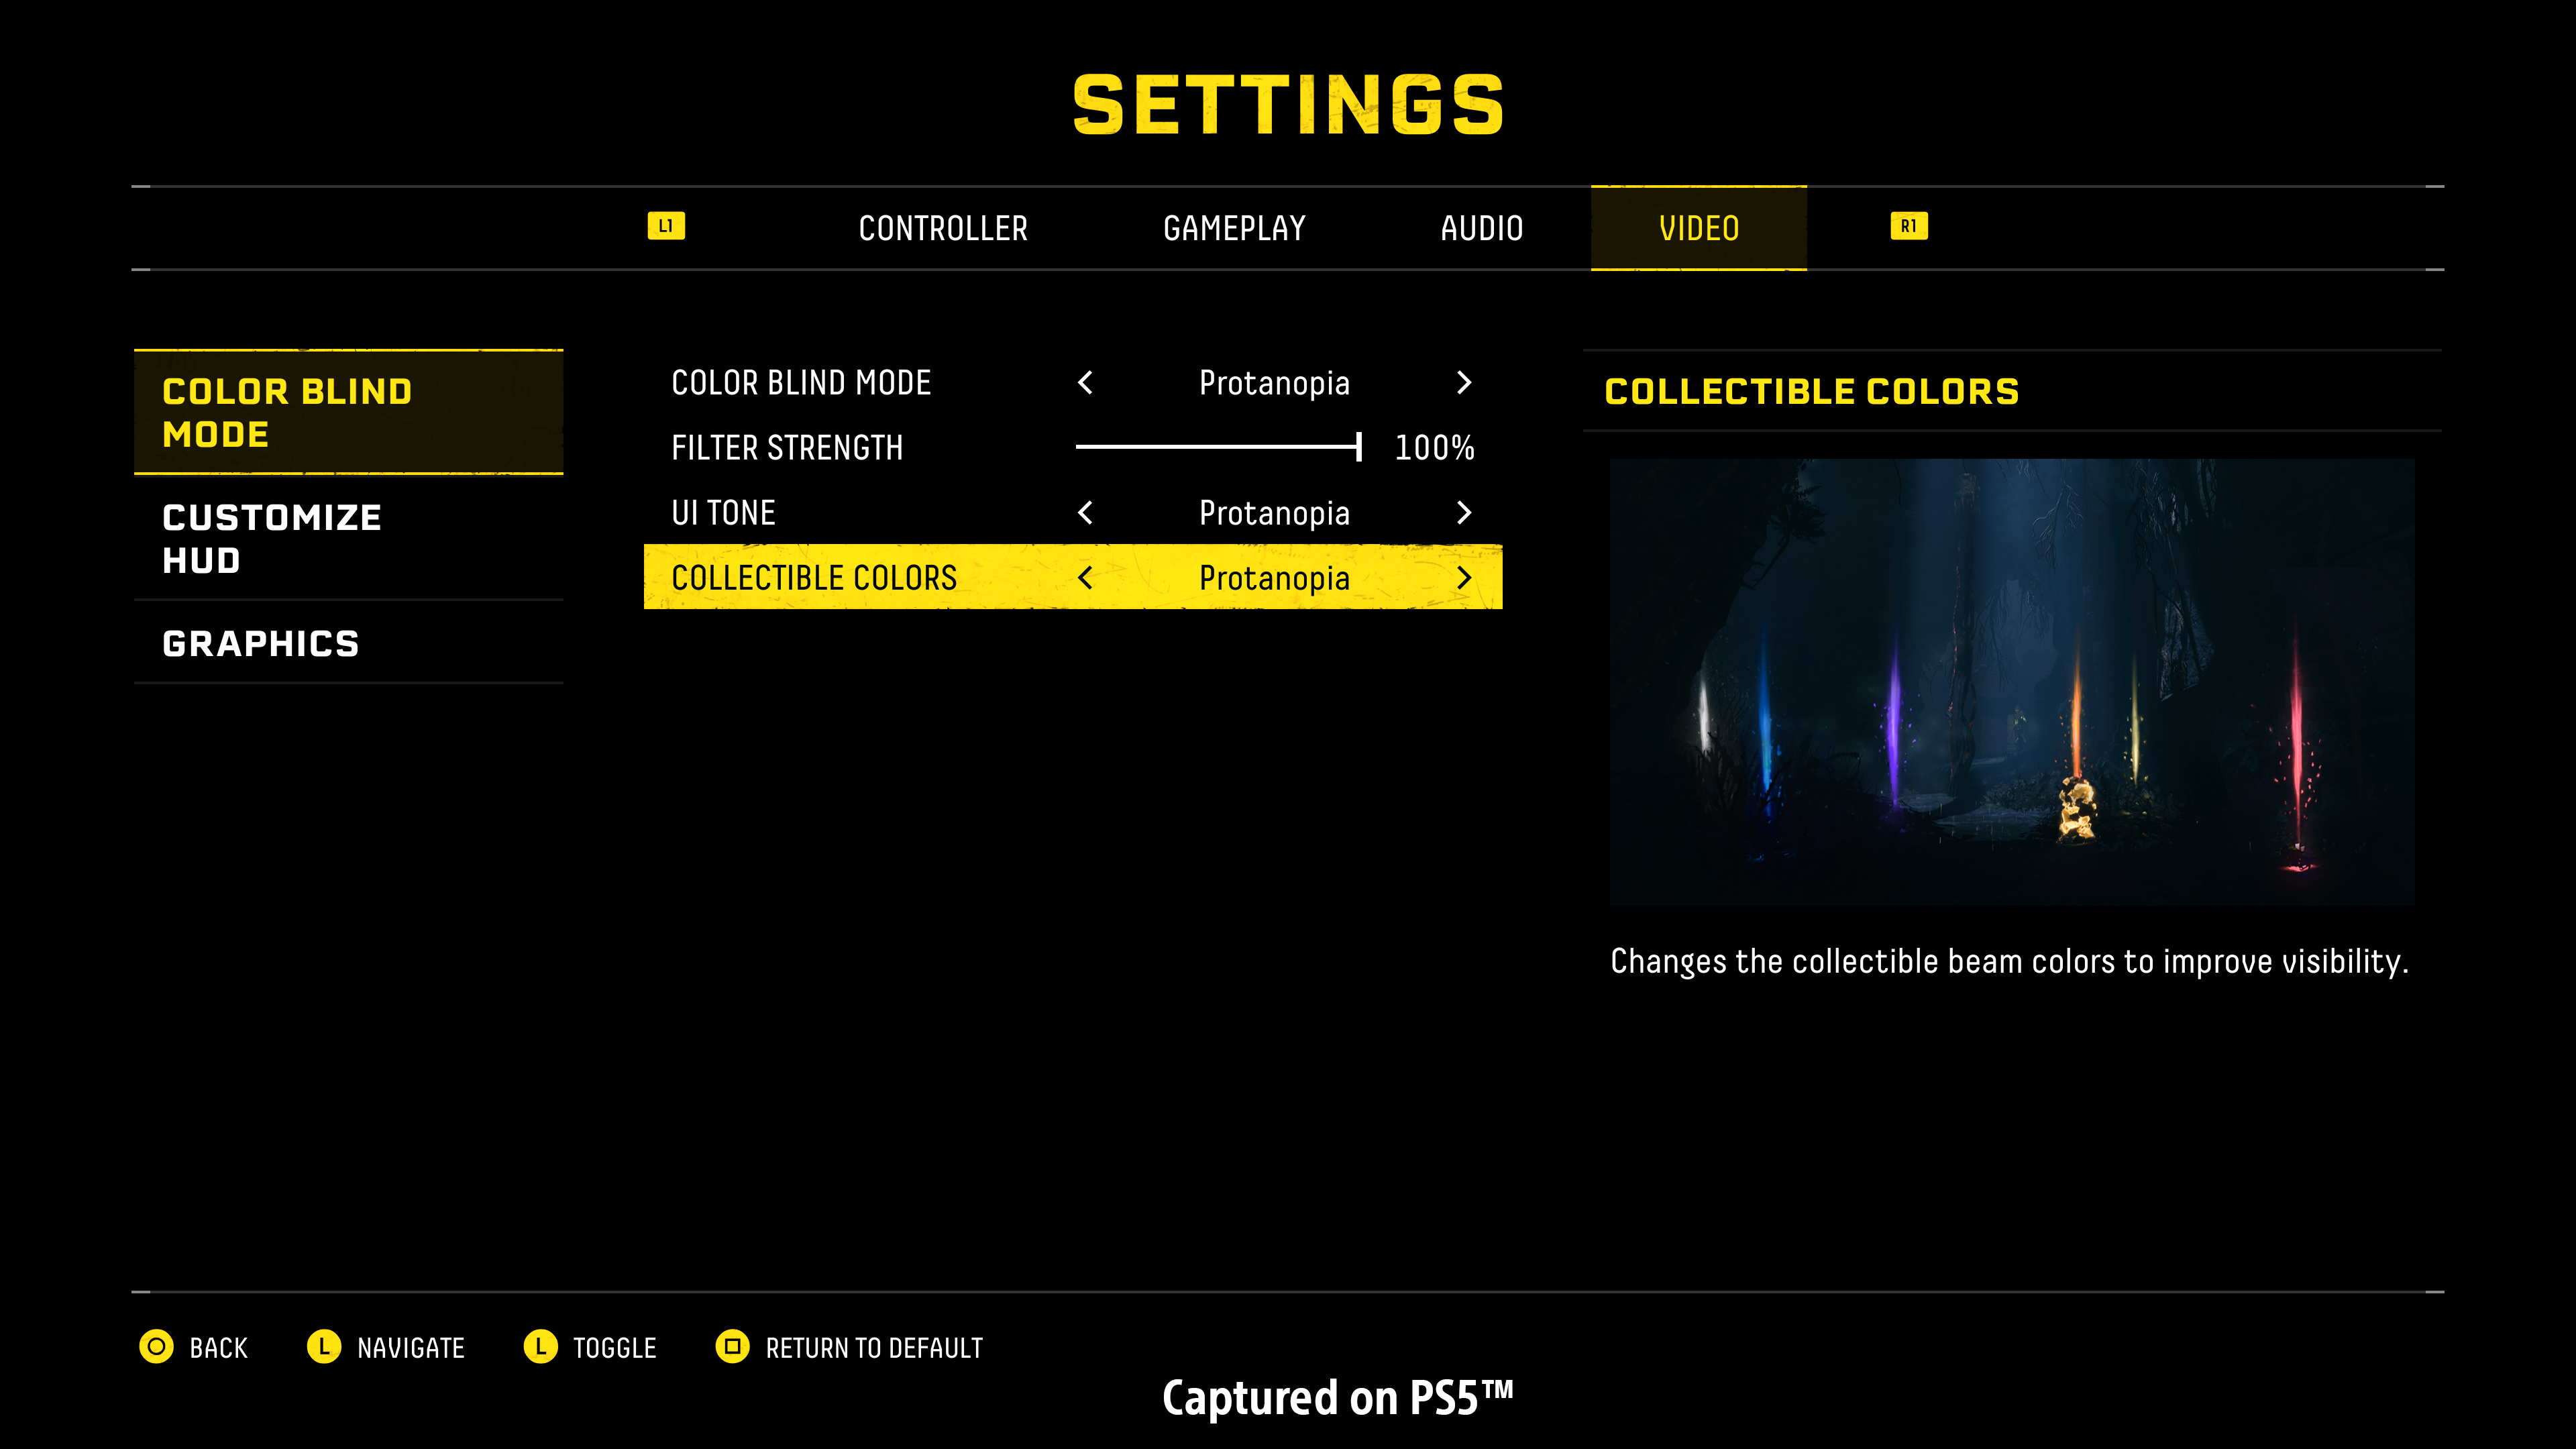
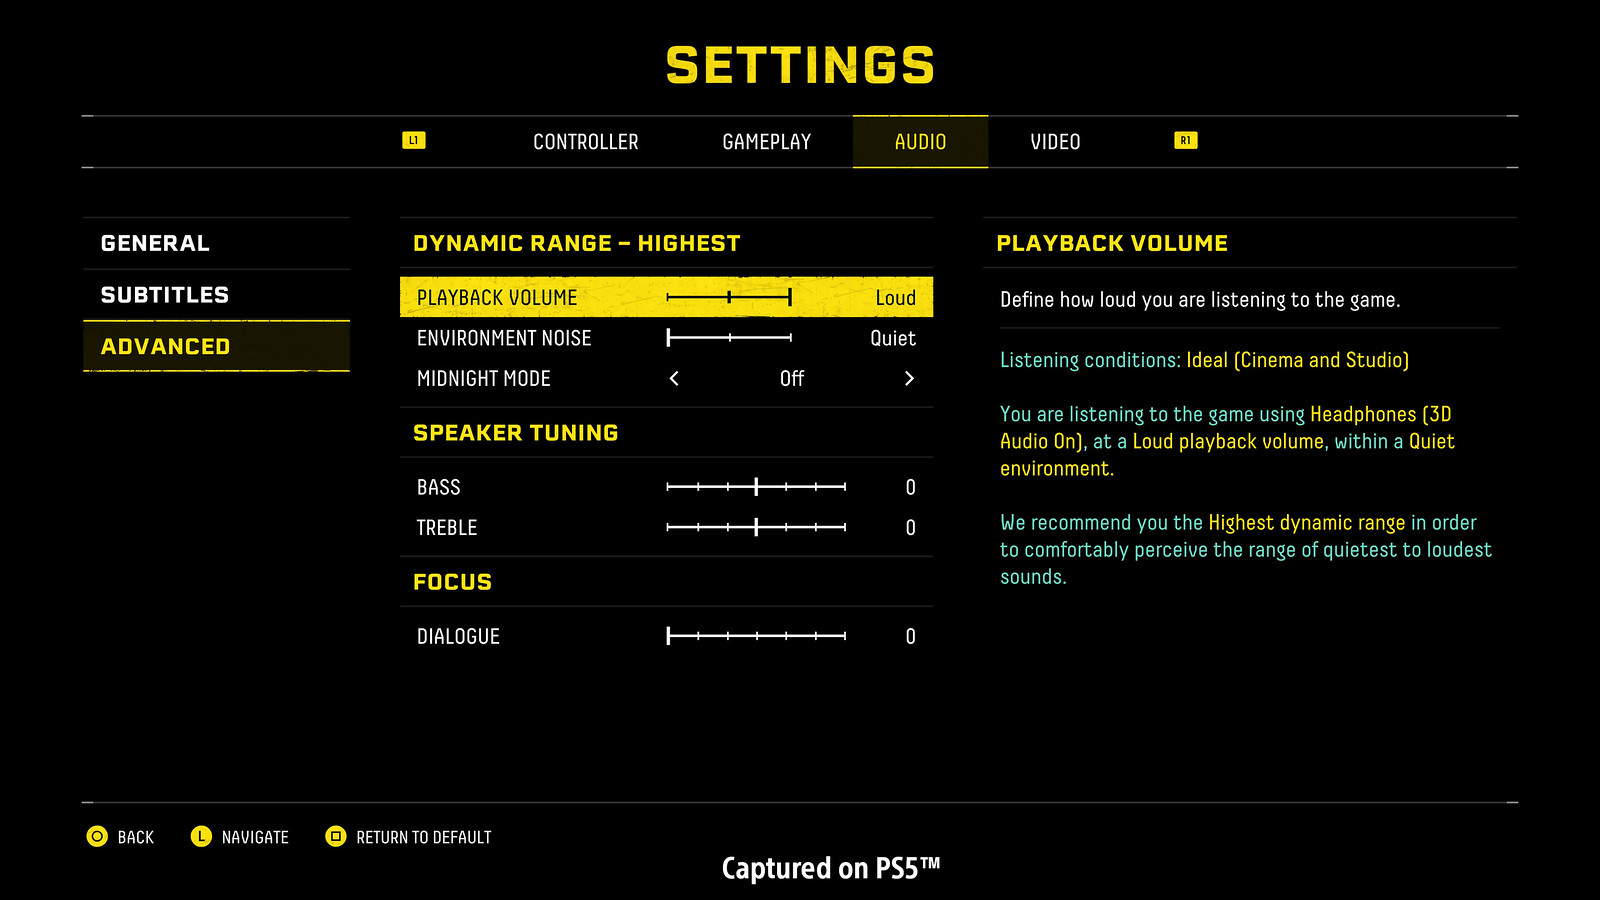
Returnal has many different settings for controls, gameplay, audio, and video, and within these categories are features developed for accessibility. We worked from the ethos of these not being separated out to an “accessibility” category because there is such a wide range of players with different needs and these features can be used by everyone who wants them ensuring that we include rather than exclude players.
We also gave the player a larger range of choices for color blind mode. We added a slider for intensity so you can try it out and select what works for you. In addition we created three alternative color palettes for certain colors in the UI. The colors were selected based on their visibility and clarity for the three main color blind types: Deuteranopia, Protanopia, and Tritanopia. These options were added for players to try them out and use them if they found they helped increase clarity and visibility of HUD elements and text. We did the same for the collectible item beam colors, offering alternative options for players that wanted them.
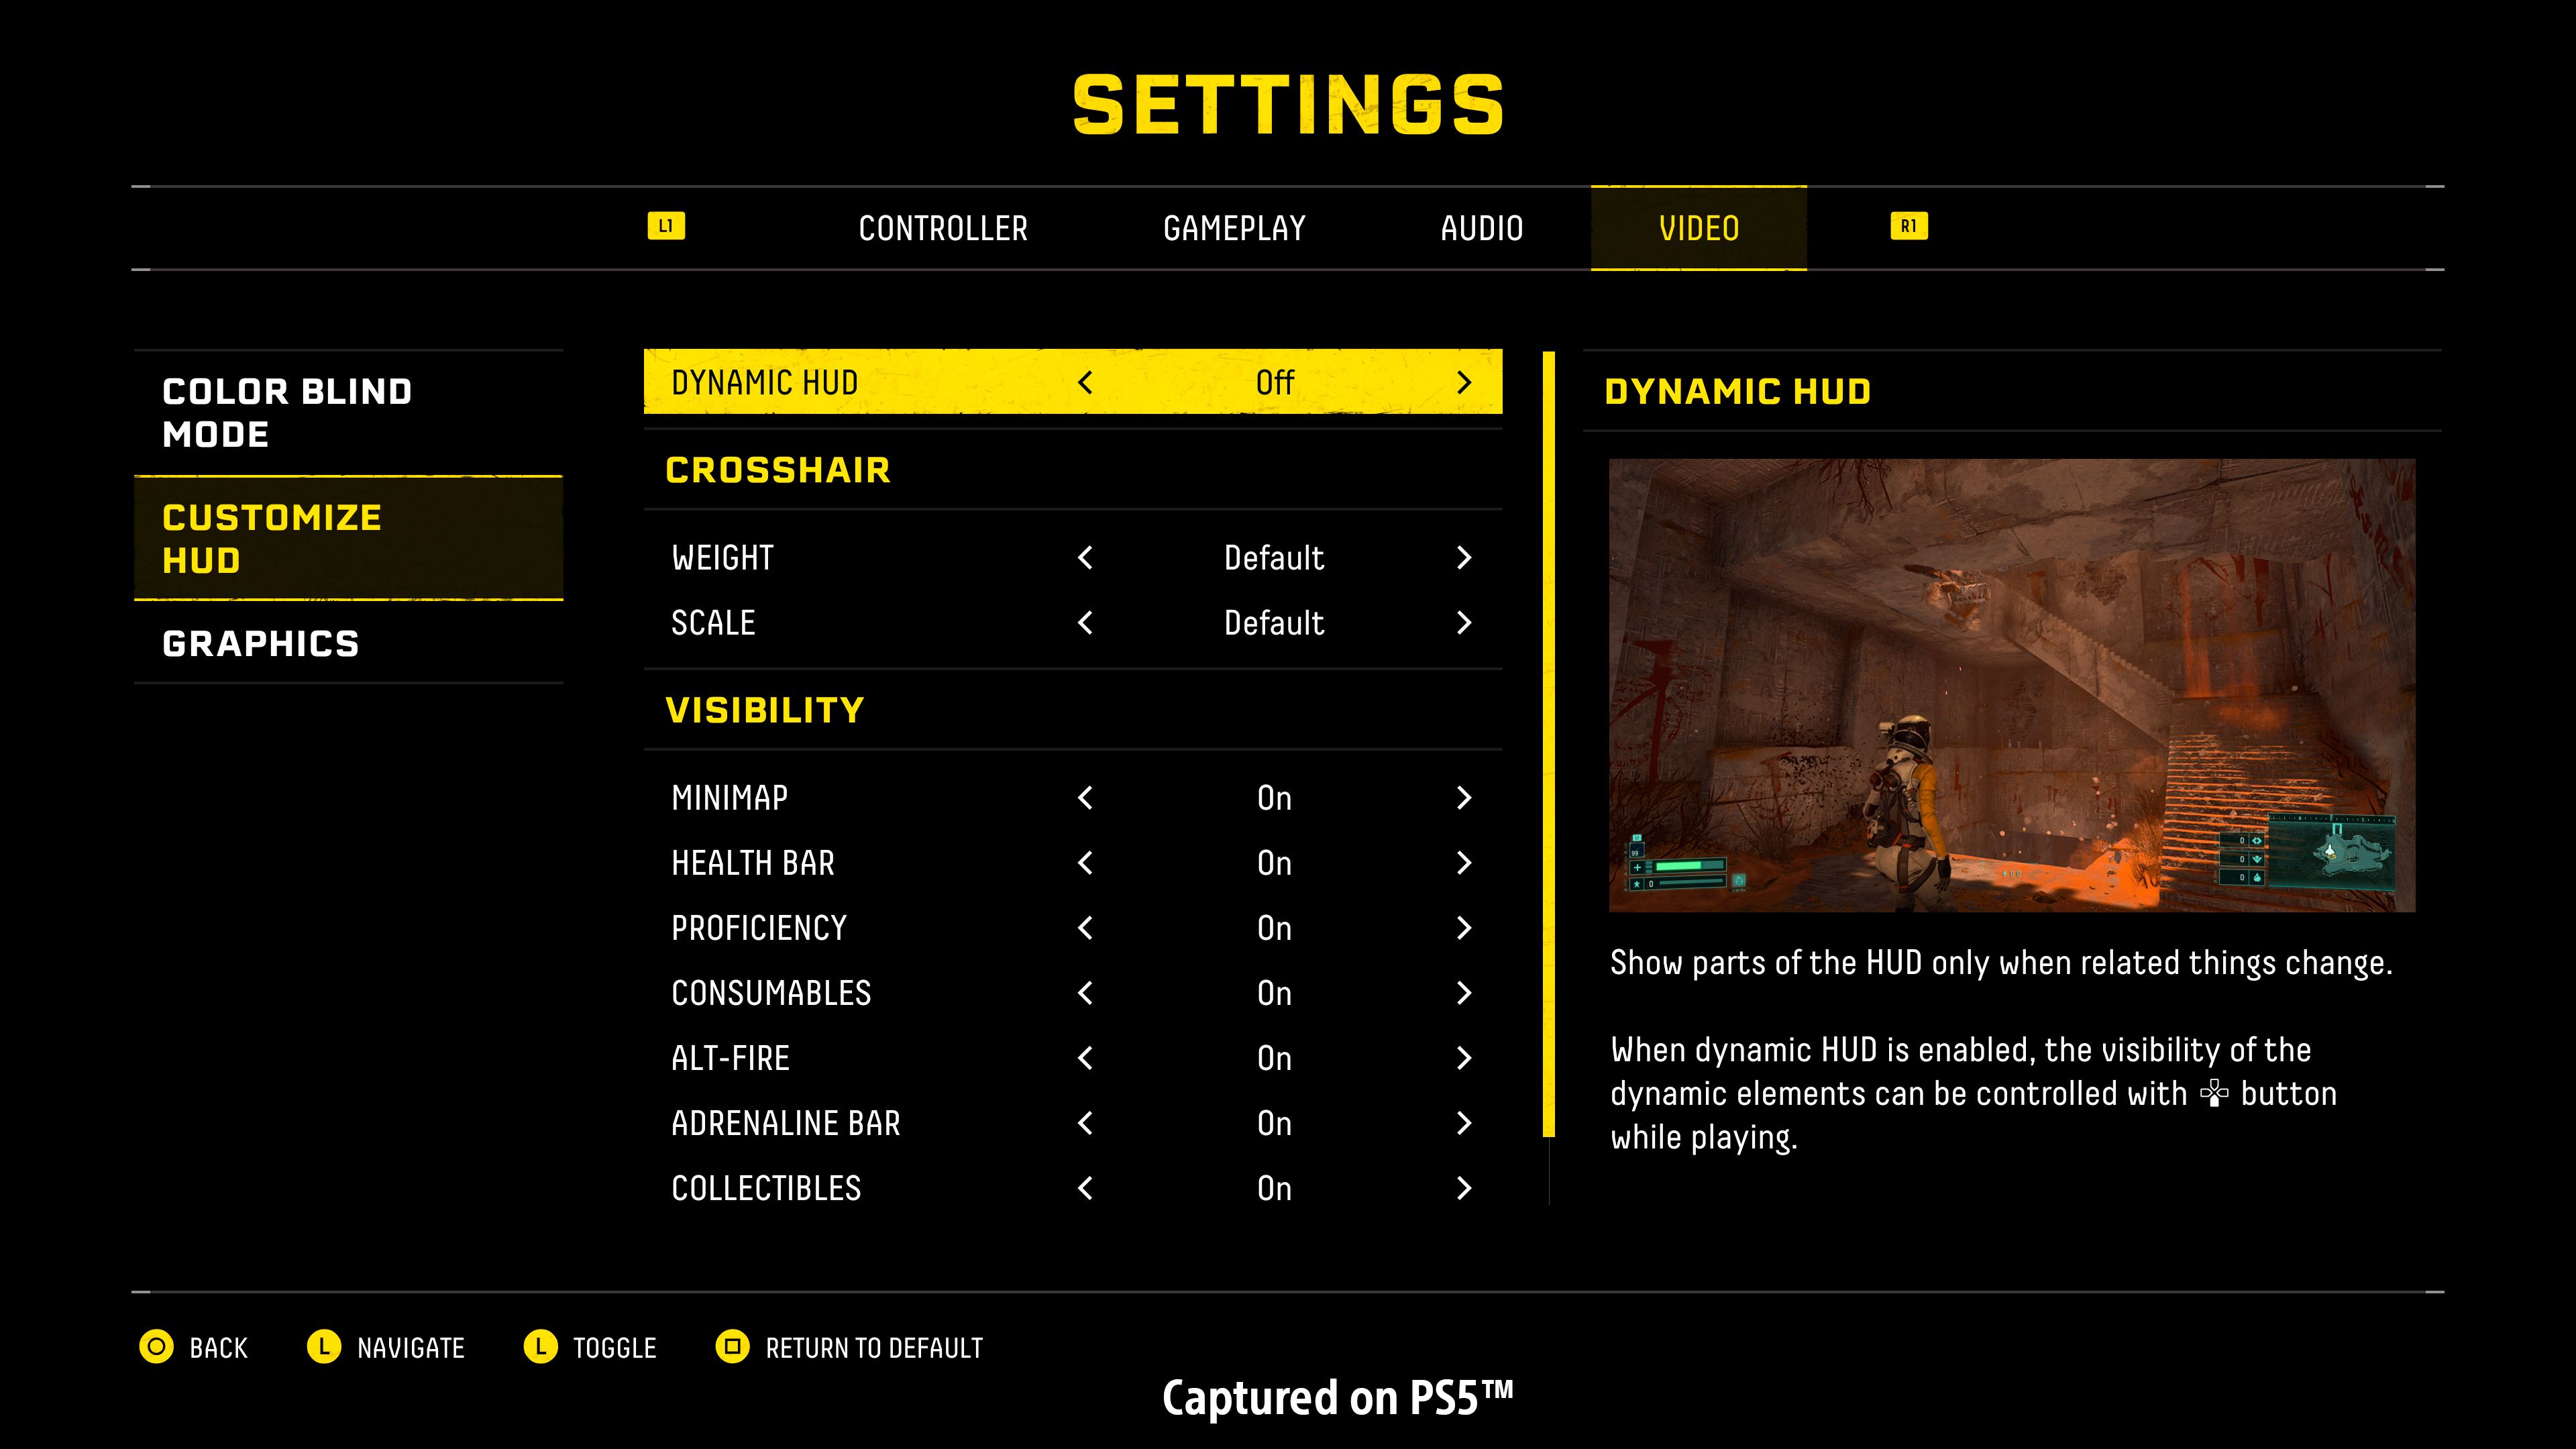
We wanted to give you multiple options to play with when customizing the text. Adjusting the size, color, language, adding speaker names and background opacity were all added to make subtitles easier to read. All the changes can be previewed in the options menu, making their choice instantly clear to the player in the menu negating the need to exit and see the changes in-game.
Thanks for taking the time to learn about Returnal’s UI/UX art direction, and to all the players who have joined us on this journey. Returnal is out now on PS5.




Comments are closed.
12 Comments
Loading More Comments