


Hi, folks!
My name’s Noel Silvia, and I’m a Graphic Artist and part of the PlayStation Network team.
I’m here today to walk you through how to make and install your own Themes for your PLAYSTATION 3. All you’ll need are:
- an image editing program (MSPaint, Adobe PhotoShop, etc.)
- the provided “compiler” program
- a little time
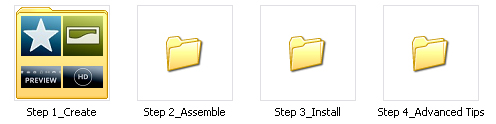
Start by downloading the “HowToMakePS3Themes.zip”.zip file here and extracting it onto your computer.
In this zip are folders with the necessary files for each step of the process.
Step 1: Create
Let’s start at the very beginning.
- In this folder, you’ll find the images that make the XMB, its sub-icons, and the background wallpapers for HD and SD resolutions.
- There is also a file called “PS3Theme_template.xml”, but we’ll come back to that a little later.
- It’s important that you don’t change any of the file names in this folder. If you do, it will cause problems later on.
- Start by deciding which icon you’d like to customize and open that image in your image editing program.
- You can alter the image any way you’d like (change the color, skin the icon, add effects, etc.). You can even replace the image completely with personal photos if you’d like.
- Just make sure not to change the Pixel Dimensions of the image; so if the icon image is 140 x 140 pixels at the start, make sure it’s the same size at the end.
- When you are done with your new icon, overwrite the original image with your new custom image.
- Make sure you save it as a “PNG” file, and not a JPG, BMP, GIF, or any other file type.
- To create your background wallpaper, follow the same steps above, making sure to maintain the original Pixel Dimensions.
- The only difference is that when you save your wallpaper image, you’re going to save it as a “JPG” file, and not a “PNG” file like the icons.
Step 2: Assemble
When you’re done making your new icons, it’s time to put the whole thing together and make the actual Theme file.
It helps to have two windows open for this part, one showing the contents of the “Step 1_Create” folder, the other showing “Step 2_Assemble”.
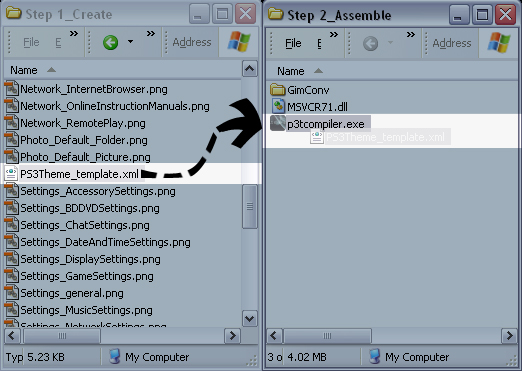
- From the “Step 1_Create” folder, click and drag the “PS3Theme_template.xml” file and drop it onto the “p3tcompiler.exe” program found in the “Step 2_Assemble” folder.
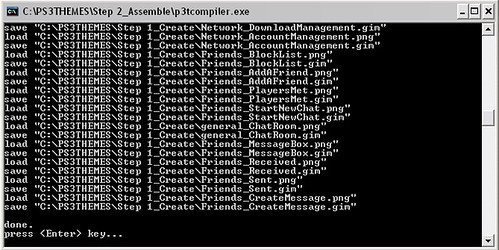
- A new window should appear, showing the program working as it puts together your Theme.
- If there are any errors, the program will stop at the error, letting you know which file is causing problems.
- When it has finished assembling the pieces successfully, a “” message will appear, prompting you to press “ENTER” and close the program.
Step 3: Install
Return to your “Step 1_Create folder.
- You should see a bunch of new files in the folder.
- The files with the “GIM” extension are special temp files. They were created during assembly but can be deleted now.
- You should also find a new file called “PS3Theme_template.p3t”. This is your new Theme file.
- Copy the file onto a detectable USB device or a one of the compatible memory sticks into the proper “Theme” folder ( \PS3\THEME )
- Connect the device to your PS3 or insert the memory stick into the reader.
- Under “Settings”, select “Theme Settings”, and then “Theme”.
- At the very top, there is an “Install” option. Once you’ve installed your Theme to your PS3, your theme will now be selectable your “Theme List”.
…and that’s how you make your own PS3 Themes!
For those of you that’d like a little more customization, please read the “Advanced Tips Guide” in the included “Step 4” folder with some extra info on how to:
- change your Theme’s title
- change your Theme’s preview art
- change your Theme’s font
- change your Theme’s color selection
- change your Theme’s Author avatar
- create a Theme with random background images
I’ll be back next time to show you how to make your own custom Themes for the PSP, but until then, have fun making your own PS3 Themes!
“If you can imagine it, you can create it. If you can dream it, you can become it.”
– William Arthur Ward


Comments are closed.
138 Comments
Loading More Comments